Setup
This section describes the steps to get the first screen displayed.
Items to Prepare Separately
Required
- USB Type-C cable (for power supply)
- A standard cable used for smartphones, etc. will work fine
- 5V USB power source
- A PC USB port or a USB-AC adapter (5V 1A or higher)
- NTSC-compatible display device
- CRT monitor, video capture device, LCD with composite input, etc.
- If you want to display on an HDMI-compatible monitor, you can use a converter device such as the following:
- Amazon
- RCA composite video cable (cable with yellow connector)
- Shorter cables tend to produce more stable video
- 3.5mm stereo mini-jack cable (for audio output)
- For connecting to earphones or speakers
- If you use a cable that converts to red/white RCA plugs and connect it to the HDMI converter device, you can route audio over HDMI as well.
- USB keyboard
- For confirmed working devices, see Verified Devices. Some keyboards may not be recognized due to compatibility issues.
- USB mouse
- For confirmed working devices, see Verified Devices. Some mice may not be recognized due to compatibility issues.
Nice to Have
- USB Hub
- Required if the keyboard and mouse are not an integrated unit.
- For confirmed working devices, see Verified Devices. Some hubs may not be recognized due to compatibility issues.
- SD card
- For when you need to handle large data
- USB gamepad
- Details to be added later
If You Want to Retain the Clock
- CR2032 button cell battery case & CR2032 button cell battery
- By soldering a battery case and supplying power to the RTC, the device can retain the time even when the main power is turned off.
If You Want to Supply Power from GROVE2
- Jumper pin
- By soldering a pin header to the GROVE2 power selection area and attaching a jumper pin, you can output either 5V or 3.3V power.
- Example product at Akizuki Denshi
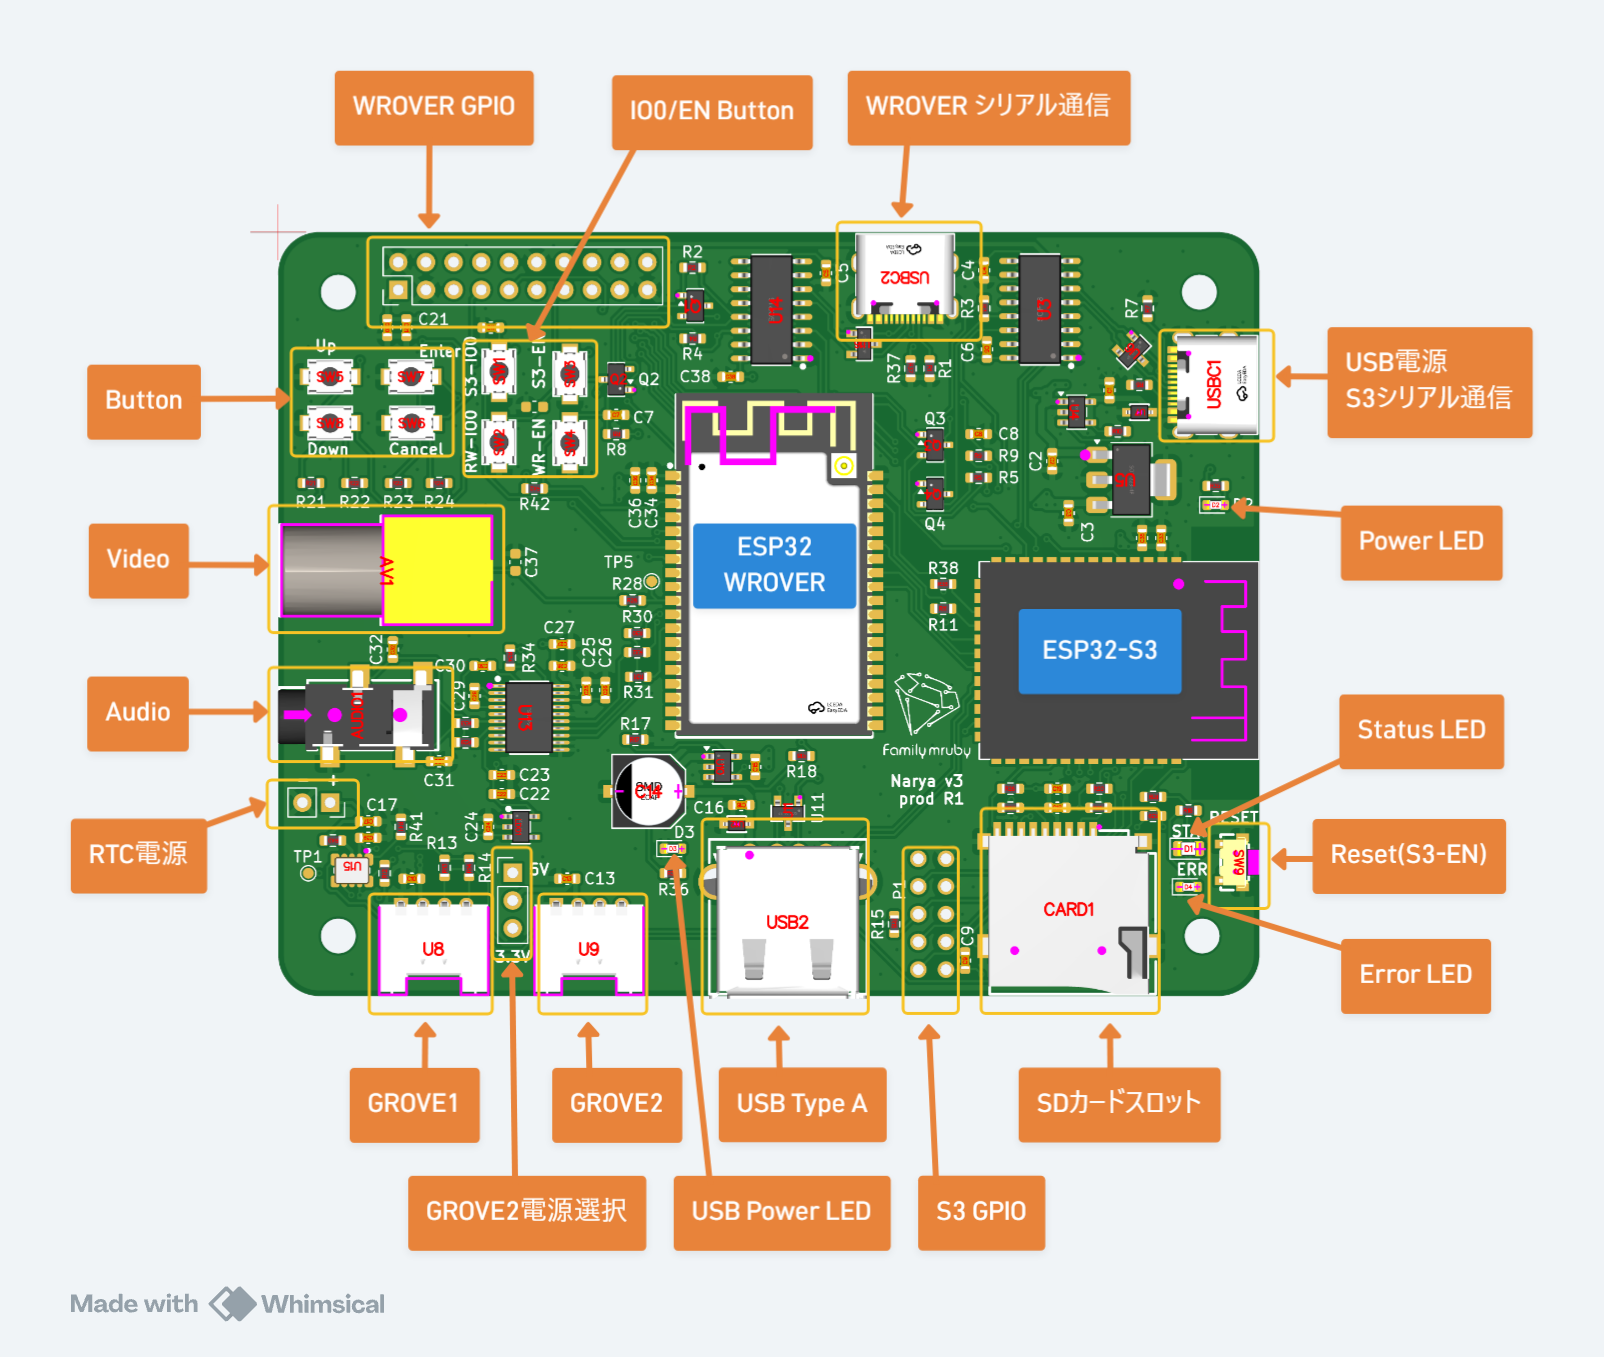
Connecting the Ports
Referring to the diagram, connect cables to the Video and Audio ports, then connect the USB cable to the USB power source.
Powering On
The device starts automatically when the USB Type-C cable is connected. There is no power switch.
To turn off the power, unplug the USB Type-C cable.
Screen Displayed After Startup
After the logo is displayed, the following desktop screen will appear. If you can operate the mouse cursor, everything is working correctly.

A startup sound also plays while the logo is being displayed.
Troubleshooting Checklist
Check the LED Status
| LED | State | Meaning |
|---|---|---|
| STATUS (green) | Fast blinking | Booting |
| STATUS (green) | Slow blinking every few seconds | Running normally |
| STATUS (green) | Off or stays lit | Possible hang-up |
| ERROR (red) | Lit | System state error |
| POWER | Lit | Power is connected |
| USB-POWER | Lit | USB host power is supplied |
If the POWER LED does not light up, the power supply is not connected. Please check the power source.
Keyboard or Mouse Not Responding
- If possible, try a different keyboard, try connecting without going through a USB hub, etc. Please restart the device after swapping peripherals.
Next Steps
- Try out the pre-installed apps
- Write your own app → Hello World
- Transfer apps and files from a PC → Console
- Hardware specifications → Hardware