Hello World
Run a minimal GUI app that displays "Hello, mruby!" on screen, and learn the workflow for writing your own apps.
This page covers a GUI app example
Family mruby apps fall into two main categories: GUI apps that draw to the screen, and headless apps that run in the background without a display. This page walks through a minimal GUI app. Headless apps are not yet supported, but you can run scripts from the Shell app.
Minimal app structure
A Family mruby app consists of a pair of 2 files.
hello.app.rb       # App body (Ruby)
hello.app.toml     # Configuration file
Place both files under /app/<directory-of-your-choice>/, then rescan from the launcher (described below) or restart the board, and the app icon will appear.
Step 1: A minimal app that just displays text
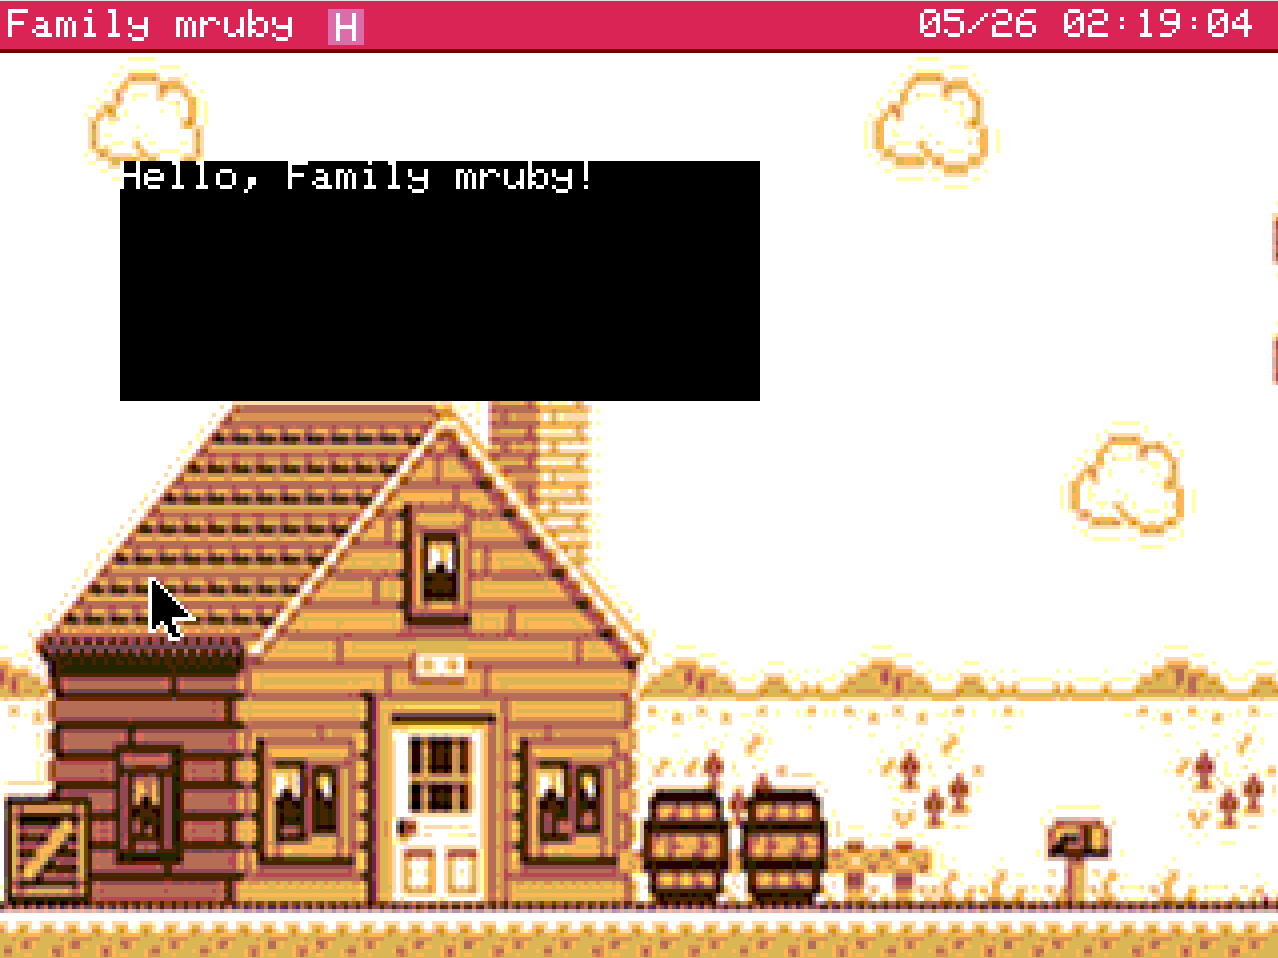
Let's write an app that simply draws "Hello, Family mruby!" on the screen.
This sample does not allow closing the window
@gfx.clear fills the entire canvas including the title bar. The title bar and close button drawn by the FmrbApp base class at startup are overwritten and disappear, so the close button is no longer visible on screen. To exit, reset the board once.
The next sample adds window frame drawing.
Create /app/usr/hello.app.rb and implement the code below.
You can write the code in the default app editor or via the web console. See Console for details on the console.
/app/usr/hello.app.rb file
class HelloApp < FmrbApp
  def on_create
    @gfx.clear(FmrbGfx::BLACK)
    @gfx.draw_text(0, 0, "Hello, Family mruby!", FmrbGfx::WHITE)
    @gfx.present
  end
end

HelloApp.new.start
Code explanation
| Code | Role |
|---|---|
class HelloApp < FmrbApp |
App class that inherits from FmrbApp |
on_create |
Initialization called once at startup |
@gfx.clear(...) |
Fills the entire canvas with black |
@gfx.draw_text(0, 0, ...) |
Draws text at the top-left corner (0, 0) of the window |
@gfx.present |
Flushes the buffer to the screen (required) |
HelloApp.new.start |
Runs the app |
hello.app.toml file
Create hello.app.toml in the same directory:
app_handle_name = "hello"
app_screen_name = "Hello"
default_window_mode = "window"
default_window_width = 160
default_window_height = 60
default_window_pos_x = 30
default_window_pos_y = 40
| Key | Purpose |
|---|---|
app_handle_name |
Internal handle name (should match the base name of the .rb file) |
app_screen_name |
Display name shown in the launcher and title bar |
default_window_mode |
"window" / "fullwindow" / "fullscreen" |
default_window_width/height |
Window size (px) |
default_window_pos_x/y |
Top-left coordinates of the window |
See App configuration file (.toml) for a full list of keys.
Launching and displaying on screen
- Once the implementation is done, open the launcher and right-click to rescan (or restart the board)
- The title bar shows "Rescanning..." — wait 1-2 seconds and the new "Hello" app icon will appear
- Double-click the icon (or click with the mouse then press Enter)
- "Hello, Family mruby!" is displayed on screen
Step 2: Displaying the window frame
In Step 1 we only drew text. To make a practical GUI app, you need to draw the title bar and close button by paying attention to the following:
- Fill only the app's drawable area (user area) instead of the entire window (so the title bar and border are not erased)
- Call
draw_window_frameafter drawing (to re-render the title bar provided by the base class)
Update the code as follows.
class HelloApp < FmrbApp
  def on_create
    redraw
  end

  def redraw
    clear_user_area(FmrbGfx::WHITE)   # Fill user area with white
    @gfx.draw_text(@user_area_x0 + 4, @user_area_y0 + 4, "Hello, Family mruby!", FmrbGfx::BLACK)
    draw_window_frame                  # Redraw title bar and border
    @gfx.present # Flush to screen
  end
end

HelloApp.new.start
| Point | Description |
|---|---|
@gfx.clear(FmrbGfx::BLACK) to clear_user_area(FmrbGfx::WHITE) |
Clears the area outside the title bar with the specified color |
Added draw_window_frame |
Redraws the frame provided by the base class. The title bar and close button are drawn |
Drawing logic extracted into redraw |
Organized for easier redraws later |
What are @user_area_* variables?
Coordinates of the area where the app is free to draw, excluding the title bar and borders. See FmrbApp > Key instance variables for details.
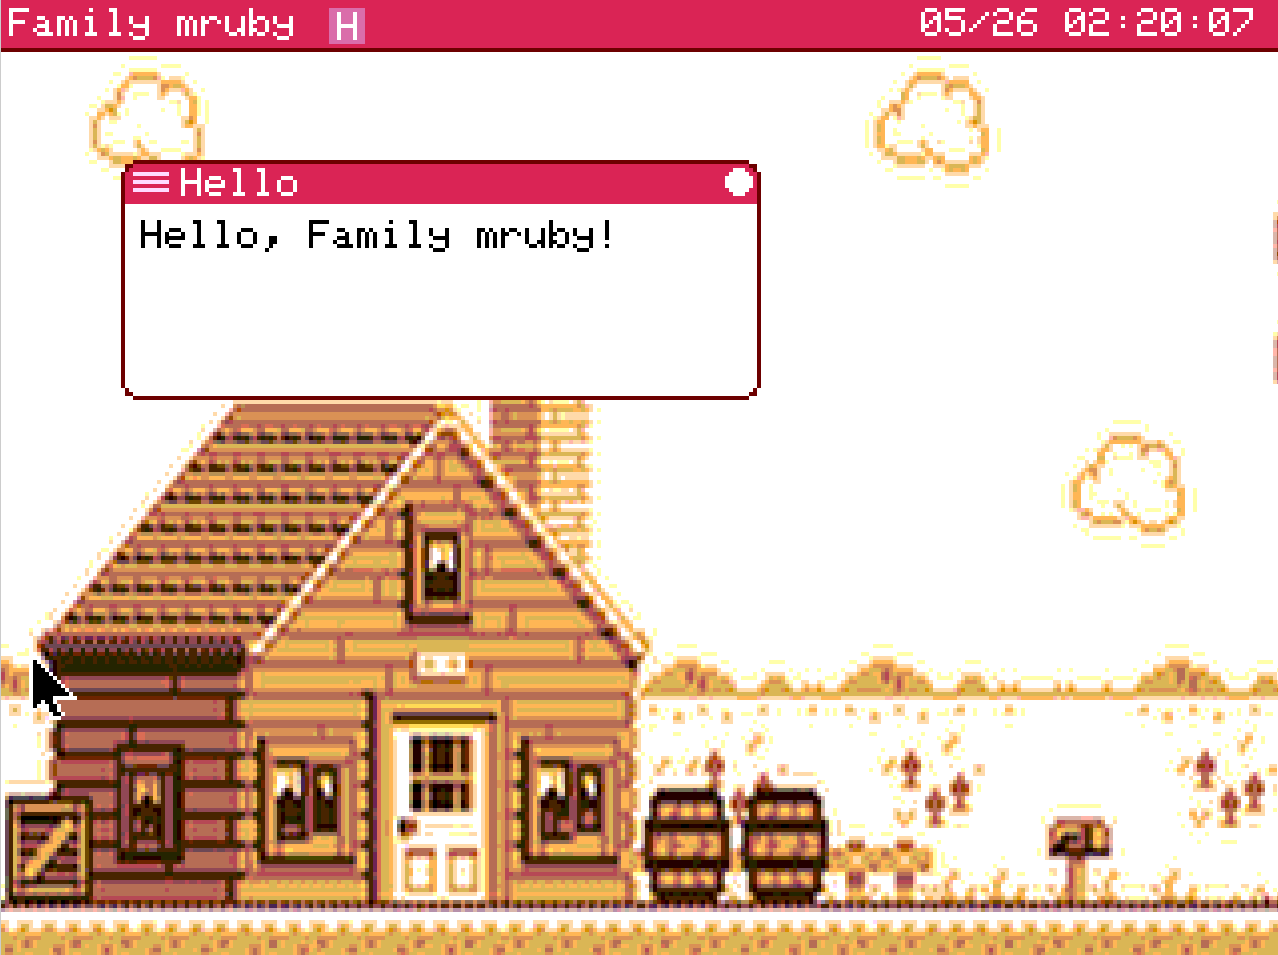
Restart and run the app — the title bar and window frame will be drawn, and you should be able to close the app by clicking the button at the top right.
Reloading a running app after edits
After editing the code, right-click the title bar of the running app and a reload button will appear. Running reload saves you the trouble of closing and reopening the app.
Shortcut: Generate a template with create_app
Writing .rb and .toml files from scratch every time is tedious. The Family mruby shell has a create_app command that generates a complete set of template files based on Step 2 in one shot.
Usage
Launch Shell from the launcher and run:
> create_app my_clock
Created: /app/usr/my_clock.app.rb
Created: /app/usr/my_clock.app.toml
Tip: edit it with `edit /app/usr/my_clock.app.rb`
This automatically creates the following files, which you can use as a template.
/app/usr/my_clock.app.rb— Based on Step 2 (includesclear_user_area+draw_window_frame, with templates for allon_*lifecycle methods)/app/usr/my_clock.app.toml— Standard-sized window configuration
Reflecting changes in the launcher
The launcher scans and fixes the app list at startup, so newly added files do not appear automatically. To trigger a rescan, right-click inside the launcher window. A restart also updates the list.
App file naming conventions
The argument to the create_app command must contain only lowercase alphanumeric characters and underscores, starting with a letter. Examples:
| Input | Generated class name | Display name |
|---|---|---|
hello |
HelloApp |
Hello |
my_clock |
MyClockApp |
My Clock |
snake01 |
Snake01App |
Snake01 |
The class name is generated by converting snake_case to CamelCase with an App suffix, and the display name (app_screen_name) is generated in Title Case.
Destination directory
Templates are placed in /app/usr/ (created automatically).
Customizing the template
The template files themselves are located in /usr/share/template/:
/usr/share/template/app.rb.template
/usr/share/template/app.toml.template
Editing these files directly lets you customize the output of subsequent create_app calls to your preference.
| Placeholder | Meaning |
|---|---|
{{name}} |
Name in snake_case |
{{class}} |
Class name in CamelCase (with App suffix) |
{{title}} |
Display name in Title Case |
Next steps
- Try drawing shapes: FmrbGfx
- Add event handling: FmrbApp > Event handling
- Read existing samples: Sample collection
Troubleshooting checklist
Icon does not appear in the launcher
- Did you right-click in the launcher to rescan? (see Reflecting changes in the launcher)
- Is the
.tomlfile in the same directory as the.rbfile? - Is
app_screen_namespecified in the.toml? - Have you set
launcher_visible = false? - Is the file located under
/app/<dir>/?
App starts but closes immediately
- It may be crashing due to an exception. Check the logs:
- Add
Log.infoinon_createto verify progress
- Add
Nothing appears on screen
- Check that
@gfx.presentis being called - Check that drawing coordinates are within the
@user_area_x0 / y0 / width / heightrange