For BOOTH Buyers
For those who purchased a board from this sales page.
Please check the included items, and if anything is missing, contact us via BOOTH messaging.
If everything is in order, proceed to Setup.
Included Items
| Item | Quantity | Notes |
|---|---|---|
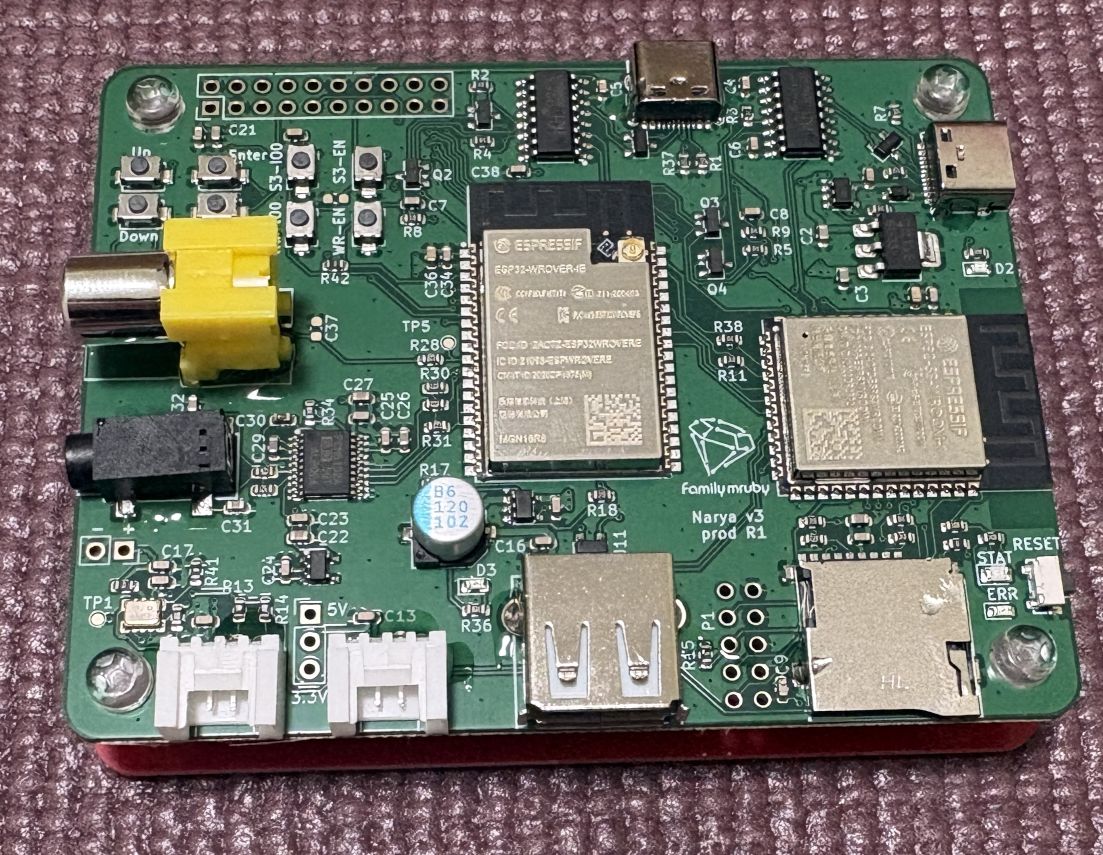
| Narya board | 1 | Board for Family mruby |
| Base plate | 1 | Plate used as a base for the board |
| Spacers | 4 | Spacers for the board base |
| M3 screws | 8 | Screws to fasten the spacers, board, and base plate |
| Pin header (3P) | 1 | For selecting the power source of GROVE2 |
USB cables, video cables, audio cables, etc. are not included (see the next section).
Assembly
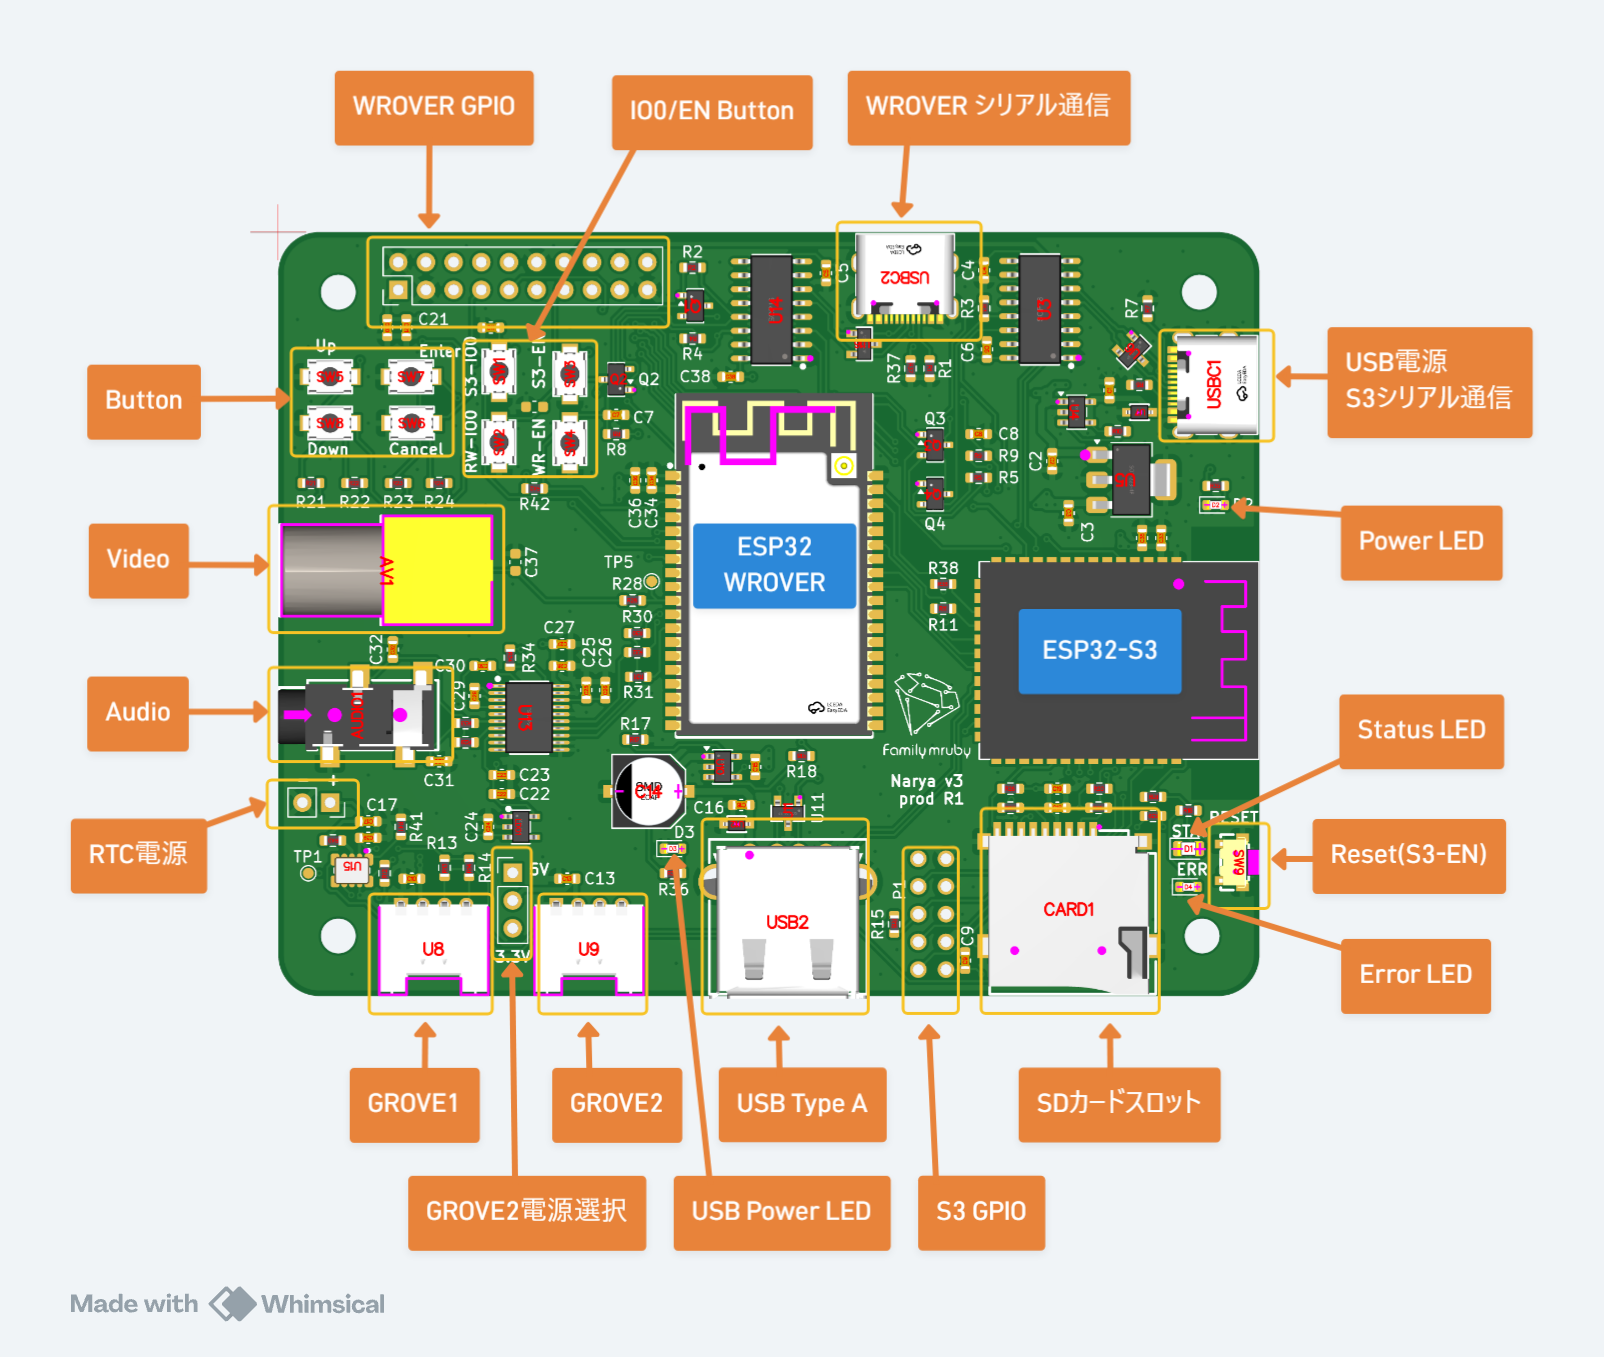
As shown in the photo, attach the spacers to the four corner holes of the board using screws.

A top plate is not included, but you can add one by using additional spacers.
For Those Who Want to Make a Top Plate
A plate made with the following dimensions will match the board size and can be fastened with M3 spacers and screws.
- Dimensions: 700mm x 900mm
- Hole positions: 5.5mm from each corner
Installing the RTC Power Source
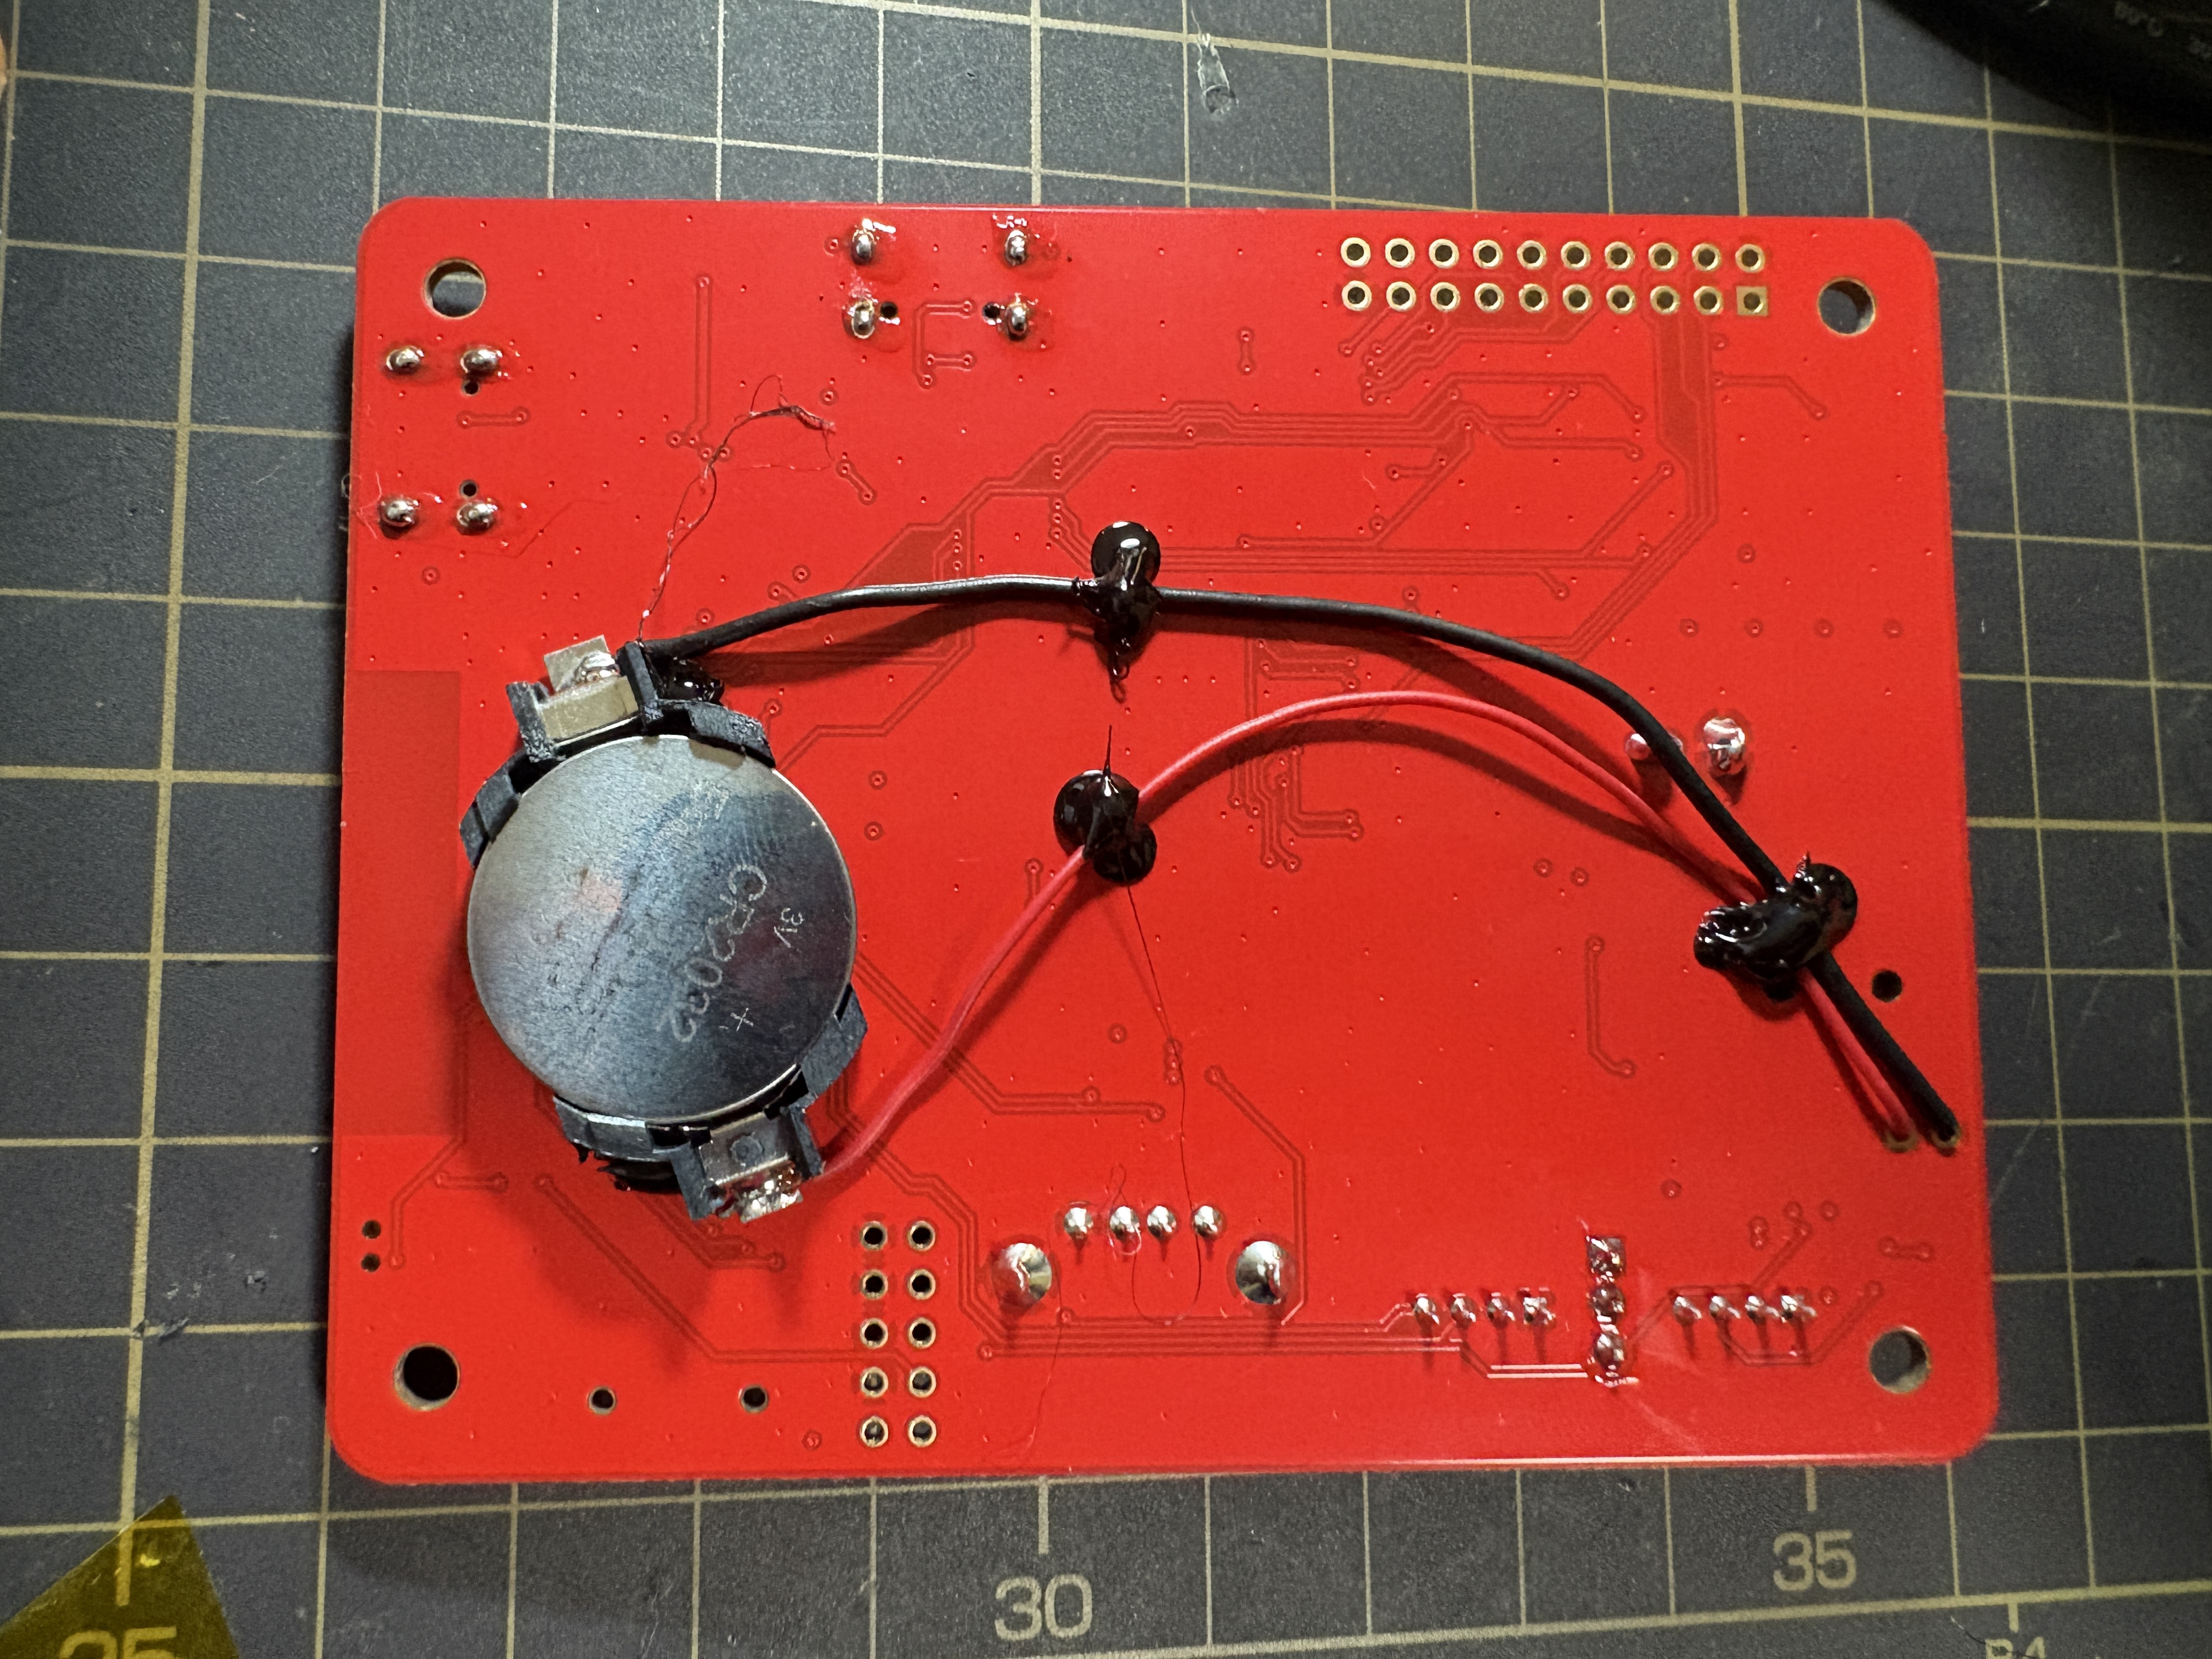
If you want to supply power to the RTC, solder a CR2032 coin cell battery holder to the + and - terminals of the RTC power section.
- The holder and battery are not included, so please prepare them yourself if needed.
- Be careful not to reverse the polarity, as it may damage the RTC.
- Wiring on the back side looks clean, but be sure to insulate the battery holder's electrodes so they don't contact the solder pads on the back and cause a short circuit.
Installation example
Soldering Pin Headers (If Needed)
The power lines of GROVE2 are not connected to anything by default.
If you want to output power, solder a pin header to the GROVE2 power selection area shown in the diagram below, then attach a jumper pin (not included) to select either 5V or 3.3V power output.